Showing posts with label nursery. Show all posts

April 10, 2014

Nursery #2

I swear you blink, and life has passed another year. I obviously haven't kept up with my craft blogging, and I wish I still had time to do so, but with my company doing newborn props and life in general, there is really no time left. We moved into our new home about a year and a half ago, and there is a tiny 8x10 (really 8x8 of usable space) room next to the master that works perfectly as a nursery. So about 5 months pregnant with baby girl #2, I started. Hubby helped me pick out the fabric, which was fun. We orignally thought we might have a boy, and I bought a cute little fox bonnet because I wanted a woodland styled boy nursery. When we were surprised that #2 was a girl, hubby still wanted to use the fox and orange theme through out it, so we went with it! It might be that she is a spring baby, but her nursery is way more bright/colorful than #1's. (See #1's nursery here.) So without further ado, our sweet baby girl's nursery. 


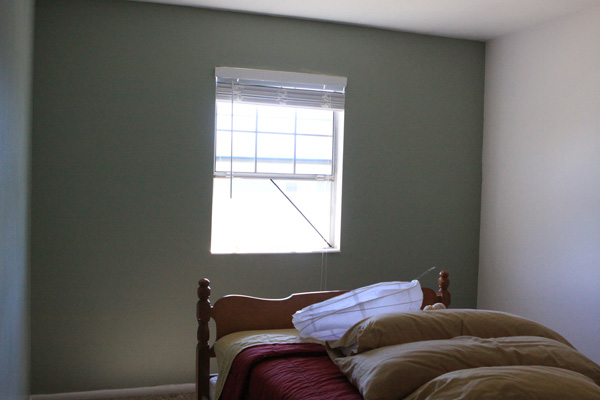
The second image is from the previous owner of the house, the third is from when we turned it into #1's nursery after moving in. #1 was not there for long though, she got moved into the bigger bedroom, and was soon converted to her big girl room. The paint we used was Silver Birch by Glidden, still one of my favorite colors. The room then sat empty for a while with a desk and a couch. 


Because we wanted to use a lot of bright colors, I went with a very soft oatmeal color for the paint. I also wanted it to have a slight modern feel, so we used just paint and decor to bring in the colors and elements. I went on the search for nursery prints on Etsy and found these that I fell in love with from Kit Chase. I made the little doll that now displays the bonnet that we bought that sort of started the whole theme. While small, the room fits cozily the big three, so I'm excited to have it. 


The camera kind of made the colors wonky in some of these, the rug is a teal/mint dusty color, not the green it shows. LOL. The blurring on the wall is where her name and letter is, which we haven't quite announced. (Well if we announce that name anyway, she may come out something else! LOL) The dresser is the one from #1's nursery. We took out all the hardware, filled all the holes and drilled new ones. We put in new hardware and I also painted a chevron pattern across the top. Most of the decor is DIY, but the frames, rug, bottles and little hook board are from Hobby Lobby, as well as the bird. A few frames from IKEA. Glider is from Babysrus, pouf and pillow were DIY. Ruffled quilt is also DIY. 


All bedding was made by me, which was a fun project. Foxes are from IKEA. (If I hear, what does the fox say, I may go into prego rage and punch a wall. Or that person in the face. Just saying. hahaha) Frames are all waiting for her newborn session. :) 


We are pretty excited for this little one to get here, and it should be within the next two weeks! So excited for Button to have a little sister, and excited to watch them grow together. I'm sorry that I have been the worst blogger alive, since none of these have tutorials. LOL. But here is a quick reference sheet for the items. Have a lovely Thursday!

Crib: Lauren from Graco
Glider: Chenille in Ivory from Newco/Babysrus
Dresser: Restored/DIY
Pouf: DIY, Tutorial HERE.
Bedding: Made by me (Most fabric was from Joanns)
Ruffle quilt was inspired by #1's as seen HERE.
(pinterest diy crib sheet, etc etc and you will find tons of tutorials)
Bassinet: Thrift
Floating shelves: Ikea, or Walmart. I can't remember
Flag bunting: Made by me
Chair pillow: Made by me
Rug: Hobby Lobby
Dream Big art: DIY
Frames: IKEA and Hobby Lobby
Nursery Art: Kit Chase from Trafalgar Square
Miscellaneous Decor: Hobby Lobby
Felted bow for newborn pics: Milkmoney on Facebook and Etsy
Fox Bonnet: Two Crafty Mamas on Facebook and Etsy
Vintage Inspired Doll: Made by me
Dresser Hardware: Hobby Lobby and IKEA
Curtains: DIY from Twin Sheets, Ricrac from Hobby Lobby

That should do it, have a lovely day! 


January 13, 2011

The Nursery!!

I am sure that I am way more excited to show you this then you are to see it. Oh well, you're still looking right? :) Now I just need a baby to put in it...
 

This is the before. Sorry not the greatest picture, but it's all I have. Originally this was just used as a guest bedroom. I had painted three walls a soft green and was going to do the fourth wall as an accent for boy or girl. Since we weren't pregnant at the time, the wall stayed white. Forever. Yea, real classy. :) And the bed really wasn't always in the position, I promise. It's just pulled back from the wall.

After going through a bit of change in design taste, I knew I wanted the nursery to be gray with a board and batten look. So we set off to make a fake molding. The how to is here.

 The theme of the nursery was Birds. Originally I wanted a little more vintage feel, but it ended up coming out really delicate and clean, which I also love.
 I found the big cage at The Salvation Army and spray painted it white. The other little ones my friend found at Michaels for $1 and used them to decorate my shower. Love them! Gray ribbon is from the dollar store, pink from Hobby Lobby, and the little birds are from the dollar store.
 A little wider angle of the birds. You'll notice this pic does not have the curtains up yet, so here ya go:
 You can find the super simple tutorial for these bad boys here. The tutorial for the ruffled table runner is here.
A close up of the lamp shade, tutorial is here. Still love it every time I go into the nursery.
 A view of the left hand corner.
 

Close up of the modpodged mirror. All the paper was from Joann's, the mirror from the DI. Tutorial here.
 Shelf when entering the room. Here is the front view:
 

The bird house I painted and modpodged the top with the same paper as the letters and paint as the murals. The little booties are just cute ones I found, the little rosette purse a gift from her Grandma. The sleigh is her first ornament from Michaels, but I liked it so much I put it in here. The bird is my favorite ornament from growing up. The wreath I made using this tutorial. Yea, I realize I only painted half, but there ya go. The bird ceramic holder thingy is from Ross'. :)


Shelf over crib. Ceramic bird from Hobby Lobby, vase from IKEA, roses from the dollar store, and letters and paper from Joanns.

 My favorite part of the room. I knew I wanted a toile bed set, so I looked up how much the fabric would cost me. About as much as this Alyssa Preston design. So I just cut the sentimental and bought it. :) Shelf is a shelf my dad built for me to go over my window in the bedroom when I was 15 or so. It's been repainted to creme. Material is from Hobby Lobby that hangs. The wash bin is from Ross's, with a hand crocheted white blanket my mom's friend made. Letters are from Joanns, sorry you can't see much because they are blurred.
 

 View from the entrance. The changer has a cover over it now. The rocker I recovered and it works perfectly. Tutorial is here. I made the pillow out of coordinating fabric.

I hand made the mobile from coordinating fabrics and it makes me pretty happy. The tutorial is here.


My second favorite part. I bought a pack of flat 16x20 canvases at Walmart and then picked out some paint at Hobby Lobby to coordinate. I used a bird stencil I found online, but the branches are free hand. I made the numbers stencil also just from a font on the computer. Ribbon is from hobby lobby and I just hot glued it to the top corners to make a loop. After hanging I added the little bows over the top.

 The nursery furniture. Boy these were ugly before. They rock now though! Read about them here
.
 I love this bassinet. It made it through all my parents children, including me. It worked perfectly in the color scheme, and the cover, pad, and sheet are all from my friends bassinet- the ones you can get at Walmart. I just tucked up the other two ruffle layers so it wouldn't cover the basket weave.
 I made the blanket from fabric I found at Joanns. I just needed two yards, one for each side. Put right sides together and sew a seam, leaving a little area open. Flip the blanket inside out and push out the corners. I sewed a little x right in the middle, then just top stitched around the edges. I tied the bow and sewed it into the corner so it would be secured.
 Close up of the wash bin. It's actually one of my photography props, but I think it works great here too. :)

I CANNOT wait till she gets here. :) Sometimes I just sit on the rocker like a crazy person waiting. I'm totally in love with her already, so I just need to meet her. :) Hope you have an amazing Thursday! Your comments (and following) are most welcome!

January 03, 2011

home {made} mobile

It's Monday! Hope everyone had a great weekend and New Years! I can't believe how time is flying. I feel like I'm on a huge merry-go-round and no one will let me off. Oh well.
Today I'll show you how to make this! I'm pretty particular about how little E's room is going to look, so I knew that I would have to make the mobile for her crib because I knew I would never find anything to match the theme.
 My awesome sister in law was great enough to give me the mobile off her son's crib who has now outgrown it. I needed the plastic pieces and even though the mobile was cute, it was all boy. I used the original pieces as a pattern. I measured out the fabric for the piece that would go over the mobile stand.
It curves out at the bottom to allow room for the bend in the plastic. The original fabric piece was actually longer than the piece I cut because the original piece allowed for a lot of bunching on the stand. I didn't want it to do that much so I cut it shorter. I also cute the piece on the fold which is important. I finished the ends of the piece and then I folded and sewed right side together using 1/4 inch seam and then flipped it right side out.
 It slid right over the stand and fit perfectly.
 For the next part I used the original cover of the mobile for a pattern. Sorry I didn't get a picture. I actually just used one square piece of fabric a little larger than the original piece to allow for the ruffle seam. I cut 4 strips of gray suede leftover from this project and matching this project about twice as long as the square sides. I then used a basting stitch and gathered them in, pulling the bobbin thread.
 I then pinned them to the sides and sewed them down.
 For the back of the square piece I cut out four triangles matching the corners of the square and pinned them to each corner creating a little pocket. The mobile legs will go in each pocket.
 I also sewed the ribbon I wanted for the mobile into the seam and the triangle pieces when I did a top stitch over the top of the square. It looks like crap a little rough when you flip it over but no one will see that so you're good. ;)
For the mobile pieces I wanted little birds so I free handed a pattern out of felt, cutting two pieces. I cut little wings that are petal shaped out of leftover fleece.
 Sew each wing where you want it to each of the two pieces. I sewed it right at the top so it would be able to move and appear to be 'flying' when it was stuffed. You could use any pattern you want.
 Then take your two pieces and pin them together with the ribbon inset and top stitch. I also put a feather in the back and top stitched over it.  Leave a little hole at the bottom and stuff. I used scrap pieces I had laying around to fill them. Then just top stitch over the opening.

 For the middle I tied a ribbon to the center of the mobile and glued rattan balls and feathers to give it a fun look. We did have a cat about three days ago and it only took her 2 minutes to sneak into the nursery and have feathers all over the place. I had to replace the feathers on the balls. The cat is now being 'babysat' permanently at our friends. :) At least till the baby is a bit older.

 Step back and admire! My friend recently visited and saw the nursery and said the mobile was 'very me'. I decided to take that as a compliment. :)
Let me know if you have any questions and what you think!! I'd love to hear from you! Comments (and followers) are most welcome. Happy Monday!
 
Linking to THESE PARTIES this week!


Photobucket
Related Posts Plugin for WordPress, Blogger...